The purpose of this guide is to discuss the different types of classroom technology, provide examples of classroom designs, and share recommendations on the use of classroom technologies. In addition, this resource serves as an introduction to the university’s Learning Technologies Team and the support available through Vermont State’s Servicedesk.
It is important to note that classroom equipment at Vermont State varies from campus to campus, and sometimes room to room. As a result, it is recommended that all faculty members visit their classroom spaces prior to the start of the semester, to ensure that they are comfortable with the equipment that is available.
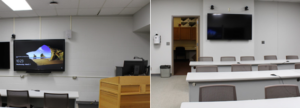
Classroom displays are located in the front of VTSU classrooms, and in some cases, there are additional displays in the rear or side of the room, which provide instructors with the ability to see remote students while facing the class. Examples of classroom display equipment include:
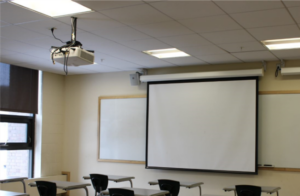
Projector and Screen
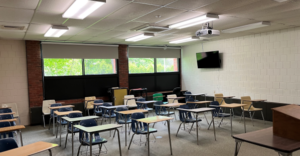
Projectors are usually ceiling mounted and project onto a pull-down screen. Projectors are typically connected to computers installed in the classroom, although there is often the ability to connect user devices to the system. Projectors may be controlled by remotes or through touch panels.
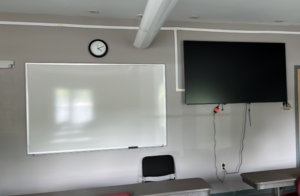
Panel Display
Projectors are usually ceiling mounted and project onto a pull-down screen. Projectors are typically connected to computers installed in the classroom, although there is often the ability to connect user devices to the system. Projectors may be controlled by remotes or through touch panels.
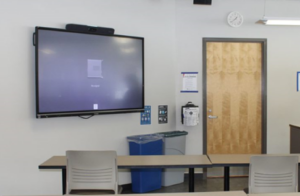
Interactive Displays
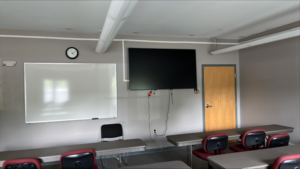
Interactive panels are mounted in the front of the classroom, replacing the need for projector and screen. These devices allow instructors to digitally write on the display, which can also be projected to remote students. In some cases, users can wirelessly “cast” personal devices to the display. Interactive panels may be controlled through physical buttons on the display, remotes, or touch panels.
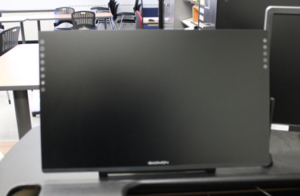
Touch Monitor
Touch monitors are installed with podium equipment, providing the ability to write on a screen that is displayed on the larger classroom display, while also allowing instructors to face students in the classroom.
Cameras are typically mounted in one of two locations: the back of the classroom, to capture the instructor, or the front of the classroom, to capture students. In a typical F2F+ classroom, the camera is mounted in the back of the room, to capture the instructor and front of the room instruction.
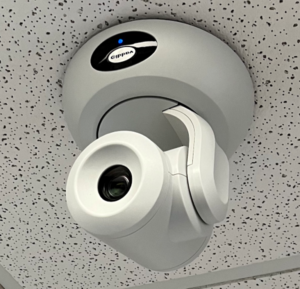
PTZ Camera
PTZ cameras provide Pan, Tilt, Zoom (PTZ) control, allowing users to adjust where the camera is directed. These cameras are typically mounted in the rear of the classroom, allowing instructors to direct the camera to different locations in the front of the room. These cameras can also be programmed to different shots, allowing the instructor to easily change the focus.
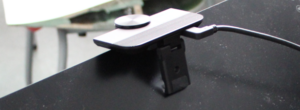
Web Camera
Web cameras are attached to local computers and typically focus on one user. These cameras lack advanced control and are considered a stop-gap for classrooms that lack installed cameras.
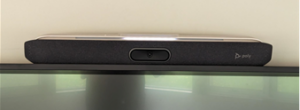
Conference Camera
Conference cameras have less control than PTZ cameras, but have a wider lens that allows for greater capture of attendees. These devices are ideally mounted in conference spaces, providing a view of all attendees. As a stop-gap measure, conference cameras are mounted in some F2F+ classrooms, acting as a front or rear capture camera.
Microphones are typically mounted on the ceilings in classrooms, with different types of microphones providing different levels of audio coverage and quality. Currently, in our F2F+ classrooms, instructor coverage is prioritized over student coverage. Long term goals include improving audio coverage to include all users in the classroom.
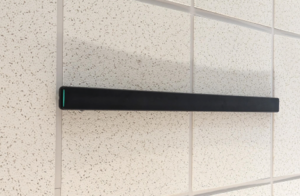
Linear Array
These high-quality microphones can cover the audio needs of an entire classroom. Linear array microphones may be mounted on the ceiling, wall, or front of the classroom.
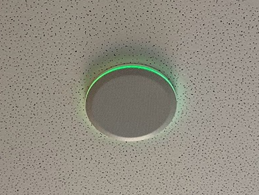
Pod/Puck Microphone
These microphones provide a smaller area of coverage than the linear arrays. These microphones are often installed in multiples to provide coverage to an entire classroom.
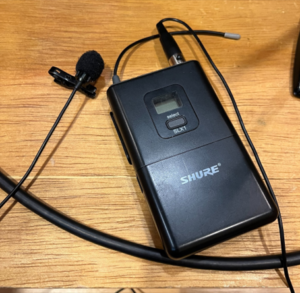
Wireless Microphone
Wireless microphones, both handheld and lavalier, are portable, allowing individuals to move around a space. These devices provide focused audio coverage and are not adequate for classroom environments. These microphones are typically found in larger learning spaces or in some telepresence style classrooms, often in conjunction with other audio solutions.
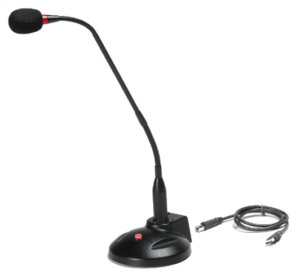
USB/Laptop Microphone
USB/Laptop microphones are useful when a single individual needs to share or record audio. These microphones are best used in stationary instances where the user is not moving, making them inadequate for F2F+ classes. These microphones may be used in emergency situations, but should not be considered a long term solution.
Classroom control refers to how users interact and operate classroom equipment. Currently, many F2F+ classrooms rely on remote control, with increased button or touch panel control as future design features.
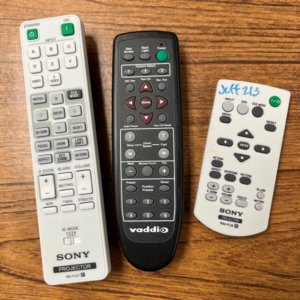
Remotes
These rooms are controlled by various remotes. Each remote controls a different piece of equipment, requiring users to understand and identify different devices. In some rooms, there may be a mixture of remotes and other control devices.
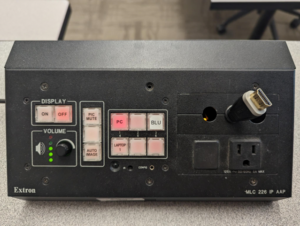
Button Panel
Button panels allow users to control specific devices on the podium. Each button corresponds to a specific action on a specific device. Not all equipment or actions can be controlled by a button panel.
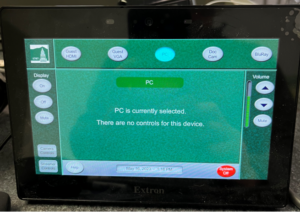
Touch Panel
Touch panels allow users to control classroom equipment using a digital touch screen. The display provides the ability to control several specific actions for each device. Touch panels can be configured to even control camera actions.
Classroom equipment varies from campus to campus, and sometimes room to room. As a result, it is recommended that all faculty members visit their classroom spaces prior to the start of the semester, to ensure that they are comfortable with the equipment that is available.
In-Person Classroom
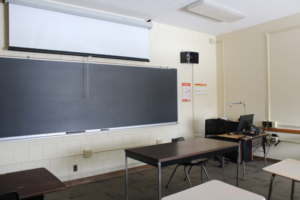
In a typical in-person classroom, instructors have access to at least one display that allows them to show in-person students projected material. These spaces do not include cameras or microphones, and do not allow access for remote students.
F2F+ Classroom
In a typical F2F+ classroom, instructors have access to at least one display that allows them to show in-person students projected material. Ideally, instructors will have access to an interactive panel, either on the wall or on the podium. Future plans include a rear or side panel that allows instructors to see remote students.
Telepresence Classroom
In a telepresence classroom, two displays are installed in the front of the room, one as a regular display and one interactive panel. A rear panel is ideally installed in the back of the classroom, but it is often an add-on rather than the norm.
In all F2F+ classroom environments, please use the installed computer as one of your Zoom devices to take advantage of the installed camera and microphone. Also, when sharing PowerPoint presentations or other materials, make sure you share screen with students. It is recommended that you share the full screen, especially if you plan to change applications (swap between PowerPoint and Canvas) during class.
- Log into the installed computer.
- Turn on the projector.
- Log into Zoom. Complete the audio test.
- In cases where there are two monitors, you can split your screen with one screen showing remote students and another showing content.
- Use the installed computer for all delivery of information.
Connect the Classroom Computer
- Login to the installed computer.
- Turn on the projector.
- Login to Zoom. Complete the audio test.
- In cases where there are two monitors, you can split your screen with one screen showing remote students and another showing content.
Connect the Laptop
- Connect to Zoom with your laptop. Do not connect to the audio.
- Make your laptop account “co-host”. This will allow you to share documents from your laptop.
Sarah Chambers
Director of Learning Technologies
Castleton and Randolph
Email: sarah.chambers@vsc.edu
Tim Dusablon
Manager of Learning Spaces Technologies
Email: timothy.dusablon@vsc.edu
Jonathan Jacobs
Learning Spaces Technology Specialist
Castleton
Email: jonathan.jacobs@vsc.edu
Jason Kaiser
Learning Spaces Technology Specialist
Lyndon and Johnson
Email: jason.kaiser@vsc.edu
The best way to contact the Learning Technologies Team is through Servicedesk. Using the Servicedesk not only allows us to track issues and requests, but also allows us to triage support. In many cases we can remotely address issues in the classroom.