Learning Tools Interoperability (LTI) is a standard created by 1EdTech that allows the seamless linking of third-party content to learning management systems (LMS), such as Canvas. Examples of frequently used resources are publisher content such as Pearson’s MyLab products and McGraw-Hill Connect or educational technology such as Perusall or Flip. Simply put, LTI is the technology that allows an external digital learning tool to be easily accessible from a learning management system. Students don’t have to create separate logins and data from the third-party tool can be passed back to the Canvas gradebook.
This guide focuses predominantly on recommended design changes to the VTSU Canvas template to accommodate LTIs, rather than the selection of and use of a specific digital tool. It is also a complementary resource to the CTLI’s Canvas Template Guide, which explains the advantages of adopting the template as well as the necessary steps for importing it into a VTSU Canvas course.
Please note that the steps described below do not apply to the version of the template used by the VTSU Online division. Instructors can learn more about the Online campus as well as their Canvas template by accessing the VTSU – Online Open Office page.
Modifying the Template
Once the use of the LTI has been approved, implementation within a course can begin. There are multiple methods for modifying the Canvas template, but the following steps are recommended by the Center for Teaching & Learning Innovation due to the fact that they minimally impact the overall design of the course as well as the student’s navigational experience. The instructions below enable faculty members to (a) create links to the LTI tool from within Canvas, (b) add the LTI content as a weighted assignment group in Canvas, and (c) create assignments that appear in the Canvas grade book and correspond to the names of assignments created in the LTI tool.
Please note that the focus of this guide is on LTI assessments that are intended to be part of a student’s grade. These changes aren’t necessary if an instructor simply wants to link to an LTI that is being used as a resource for studying or providing access to ungraded content.
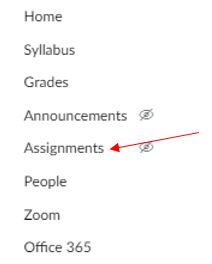
In Canvas, assignment groups are the weighted categories into which each assignment is placed. These groups can be accessed by selecting the Assignments link from the left-hand navigation panel as shown in Figure 1 below.
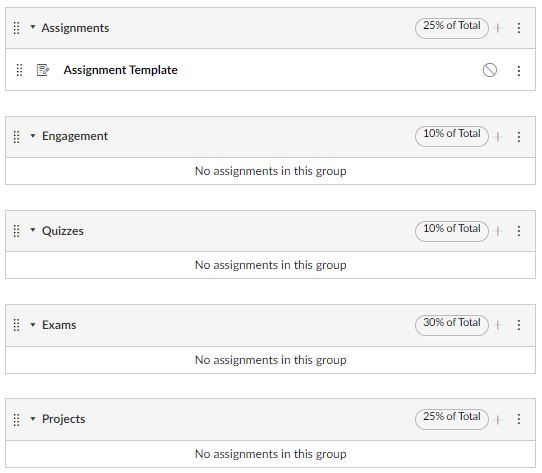
The default assignment groups include Assignments, Engagement, Quizzes, Exams, and Projects. These categories and their associated weights are shown in Figure 2 below.
Editing assignment groups is often necessary when (a) there is a category on the syllabus that isn’t present in the template and (b) the description of the group doesn’t quite fit the description in the syllabus. For example, ‘Labs’ is a category that isn’t present in the template and might need to be added and ‘Papers’ could be a better fit than ‘Projects’ in some courses, which would necessitate the renaming of the group.
In the following section, the steps for adding an assignment group dedicated to your LTI resources and assignments are explained.
- While on the Assignments page, select the +Group button in the upper right-hand side of the screen.
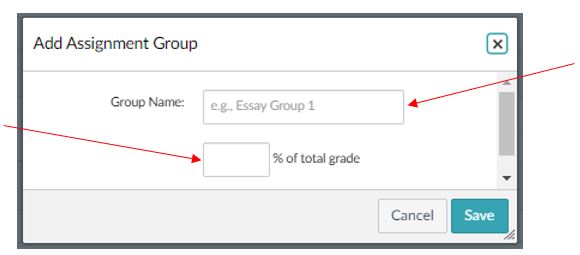
- A pop-up window will open, as shown in Figure 3, which allows the new group and associated weight to be added. The name of the group should clearly indicate its purpose to the students. For example, if integrating a MyLab product, it is advisable to name the group ‘MyLab Assignments’ or something similar.
- Once this information has been added, select Save.
IMPORTANT: Total weighting for assignment groups must add up to 100%. When a new group is added, the weighting of the other groups must be decreased until the total percentage is 100%.
Once the new group has been established, assignments should be added to the course. The number and types of assessments offered can vary based on several factors, such as the academic program’s requirements, the modality in which the course is being delivered, and the preferences of the instructor.
In the case of the LTI integration, the names of the assignments in Canvas should match the names used in the LTI tool. For example, if the name used in Canvas is ‘Week 1 – MyLab Assignment’, the assignment in the LTI tool should have the same name. This practice makes the structure more intuitive to the students and makes the process of manually transferring grades from one platform to the other easier for the instructor.
Creating the Assignment
Begin by navigating to the newly created assignment group and choosing the +Assignment button in the upper right-hand corner of the group as shown in Figure 4:

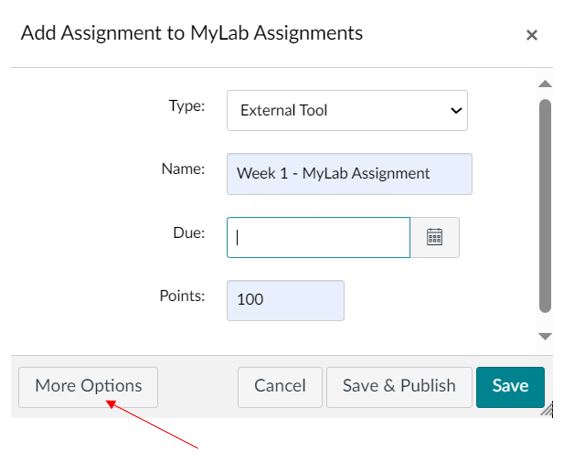
Next, complete the steps below as shown in Figure 5 below:
- Use the Type drop-down menu to select ‘External Tool’.
- Enter the name of the assignment in the Name field.
- Enter the due date for the assignment.
- Enter the point value of the assessment in the Points field. The points allocated should match the points for the assignment created in the LTI tool.
- Select the More Options button.
Configuring the Assignment
On the subsequent screen, scroll down to the Submission Type section and make the following changes, which are reflected in Figure 6:
- Use the Find button to select the external tool that will be linked to the course.
- Select the ‘Load this Tool in a New Tab’ check box.

Once the changes have been made, scroll to the bottom of the screen and click the Save button to complete the process. The Save & Publish button can also be used if the assignment is ready to be seen by students.
*Repeat Step 3 to create additional assignments.
The Student View
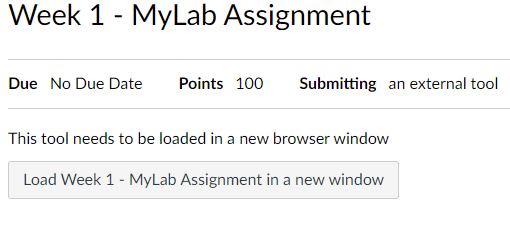
Once the course begins, the screen depicted in Figure 7 will appear when students select an assignment linked to the LTI tool. When they click the Load button, access to the external tool (e.g., login screen) will appear in a separate tab or window.
Please note that the Load button does not take them directly to an assignment. The faculty member must setup the assessments in the external tool with names that mirror those created in Canvas and manually enter the grades from the external platform into the Canvas grade book.
Canvas Best Practices
Whether a faculty member chooses to integrate an LTI into their course(s), there are some important best practices that should be considered when preparing a Canvas course for an upcoming semester. Several of these recommendations are listed below.
- Select the Student View button in the upper-right corner of the screen to evaluate how the course will appear to the student.
- Gain a familiarity with steps for creating an accessible Canvas course prior to adding content to the class.
- Test the hyperlinks within the course to verify they are working properly.
- Set due dates for all assignments, so they are clearly visible to students in their course calendars.
- Use a consistent naming convention for assignments. One best practice is to use the week number as a prefix (e.g., Week 1 – Class Assignment).
- Use the Announcements feature to post a welcome message to the class.
- Verify that all assignments have been published.
- Review the course gradebook to verify that all assignments are present.
- Avoid the use of scanned PDF documents as they will not work for student who rely upon screen readers.
- If using Zoom to meet with students, please be sure to turn on Closed Captioning.